16
2009 AmbienTone No.4 Bedienungs- & Montageanleitung Operating & Assembly Instructions

2009
AmbienTone No.4 Bedienungs- & Montageanleitung Operating & Assembly Instructions
AmbienTone No.4 Bedienungs- & Montageanleitung Seite 3-8 Operating & Assembly Instructions Page 9-15
2
AmbienTone No.4
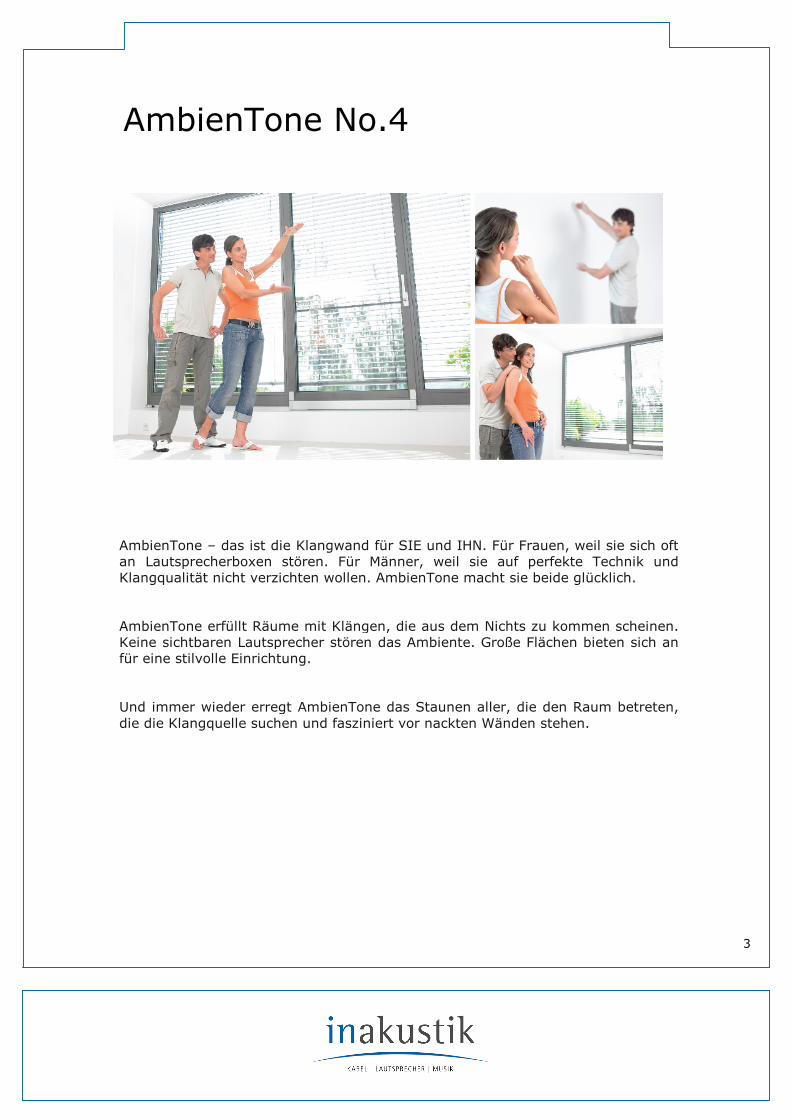
AmbienTone – das ist die Klangwand für SIE und IHN. Für Frauen, weil sie sich oft an Lautsprecherboxen stören. Für Männer, weil sie auf perfekte Technik und Klangqualität nicht verzichten wollen. AmbienTone macht sie beide glücklich. AmbienTone erfüllt Räume mit Klängen, die aus dem Nichts zu kommen scheinen. Keine sichtbaren Lautsprecher stören das Ambiente. Große Flächen bieten sich an für eine stilvolle Einrichtung. Und immer wieder erregt AmbienTone das Staunen aller, die den Raum betreten, die die Klangquelle suchen und fasziniert vor nackten Wänden stehen.
3
AmbienTone No.4 - Montageanleitung
AmbienTone ist ein Flachmembranlautsprecher in einer modifizierten Gips-kartonplatte. Installiert wird er im Trockenbau. In wenigen Verarbeitungs-schritten.
Einmal angeschlossen, eingesetzt und verspachtelt, lässt sich AmbienTone problemlos tapezieren, überstreichen und sogar verputzen. Ein bis zu 2 mm starker Wandauftrag hat nahezu keine Klangeinbuße zur Folge.
Einbauempfehlung
Anmerkung: Dies ist eine verkürzte, allgemeine Beschreibung der Vorgehensweise. Installateure und Auftragnehmer müssen unbedingt die individuellen Materialien und Gegebenheiten vor Ort berücksichtigen!
Schritt 1:
• Funktionskontrolle vor dem Einbau in die Trockenbaukonstruktion.
• Lautsprechersystem durch sorgfältige Sichtkontrolle auf äußere Mängel
überprüfen.
• Die 2 Transportsicherungen an der Rückseite des
Lautsprechersystems entfernen.
• Das Lautsprechersystem auf lose Innenteile überprüfen. Zur Überprüfung das Lautsprechersystem in beide Hände nehmen und nach allen Richtungen gerade so stark hin und her schütteln, dass eventuell vorhandene lose Teile durch das Schütteln im Inneren des Lautsprechers anschlagen und ein Geräusch verursachen würden. Ein Anschlagen loser Teile deutet auf einen Mangel am Lautsprecher hin.
• Lautsprechersystem auf elektrische Funktion überprüfen. Dazu
Lautsprecher an einen Audioverstärker anschließen und über diesen ein bekanntes Audio–Testsignal abspielen. Dabei auf die fehlerfreie Wiedergabe des bekannten Testsignals, insbesondere auf ungewollte Nebengeräuschen sowie Verzerrungen, achten.
• Lautsprechersystem nach den Vorgaben in der Einbauanleitung einbauen.
• Beim Anschluß auf die richtige Polarität (+/-) achten
4
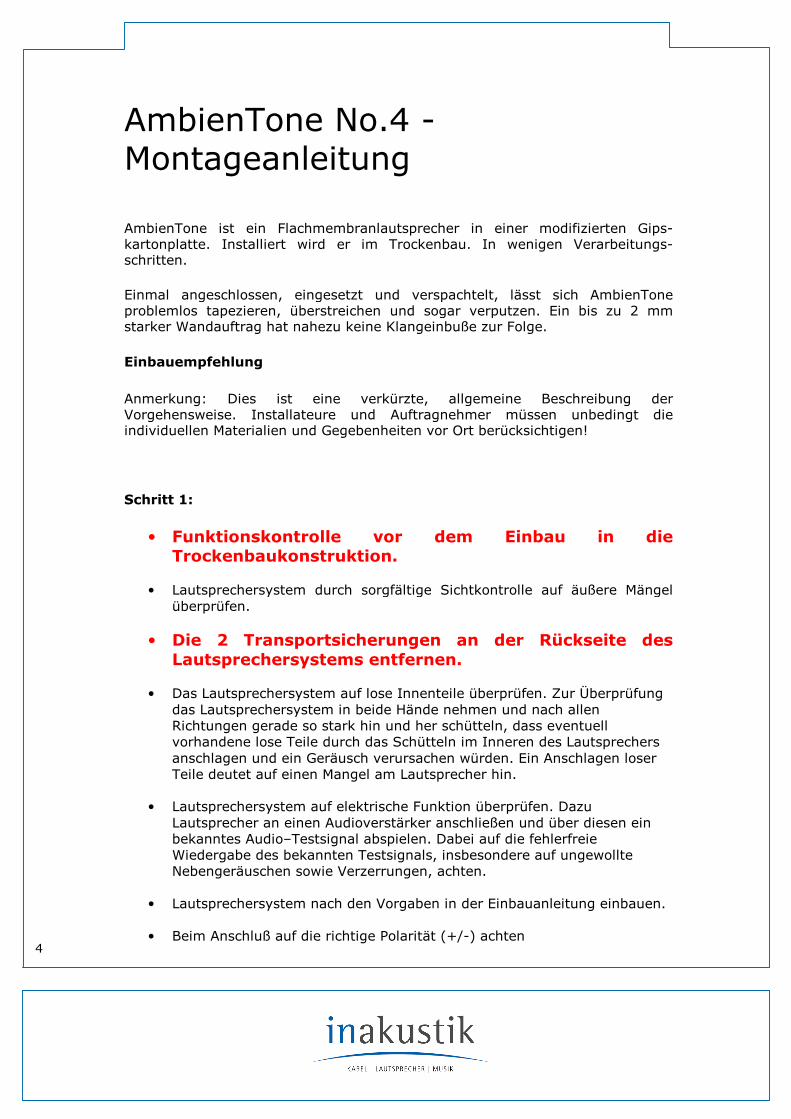
Schritt 2:
Zunächst die Wand mit Metallprofilen vorbereiten. Stellen Sie einen Ausschnitt in einer Gipskartonbeplankung her (Decke oder Wand), der umlaufend ca. 5 mm
größer ist, als der AmbienTone Lautsprecher. Für die Unterkonstruktion und Beplankung gelten die jeweiligen Herstelleranweisungen. Stellen Sie sicher, dass die Unterkonstruktion der Gipskartonbeplankung so beschaffen ist, dass sie durch die Vibrationen des Lautsprechers nicht scheppert. Achten Sie deshalb insbesondere darauf, dass sich keine losen Teile in oder an der Unterkonstruktion befinden oder mit dieser in Berührung stehen und dass der Lautsprecher rückseitig durch nichts berührt wird.
Schritt 3:
Entfernen Sie die 2 an der Rückseite des Lautsprechers befindlichen Transportsicherungen und testen Sie den Lautsprecher auf seine einwandfreie
Funktion. Nehmen Sie den elektrischen Anschluss des Lautsprechers vor !! Legen Sie den Lautsprecher in den vorbereiteten Ausschnitt ein. Um eine optimale Verbindung zwischen AmbienTone-Lautsprecher und Fugenspachtelmasse zu erreichen, beachten Sie bitte die Hinweise des Spachtelmasseherstellers bezüglich der Kantenpräparation der zu verspachtelnden Gipskartonplatten. (z.B. Anschrägen der umlaufenden Kanten)
5
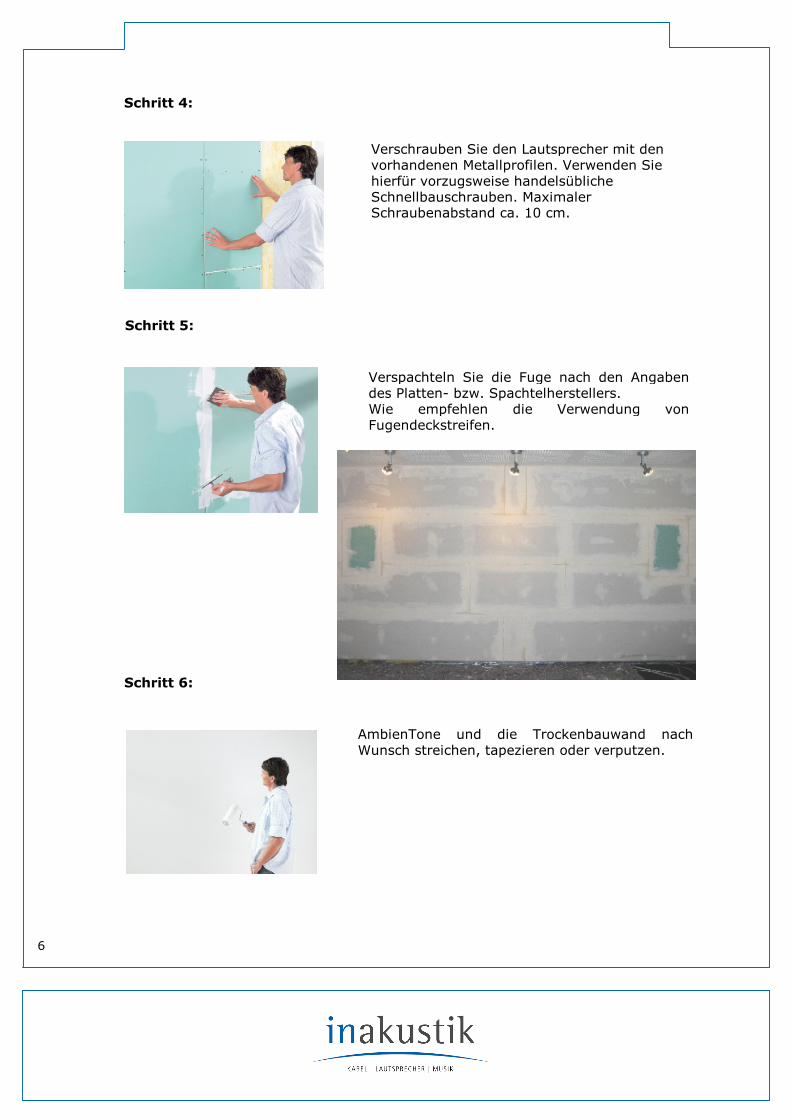
Schritt 5:
Verspachteln Sie die Fuge nach den Angaben des Platten- bzw. Spachtelherstellers. Wie empfehlen die Verwendung von Fugendeckstreifen.
Schritt 6:
AmbienTone und die Trockenbauwand nach Wunsch streichen, tapezieren oder verputzen.
Schritt 4:
Verschrauben Sie den Lautsprecher mit den vorhandenen Metallprofilen. Verwenden Sie hierfür vorzugsweise handelsübliche Schnellbauschrauben. Maximaler Schraubenabstand ca. 10 cm.
6
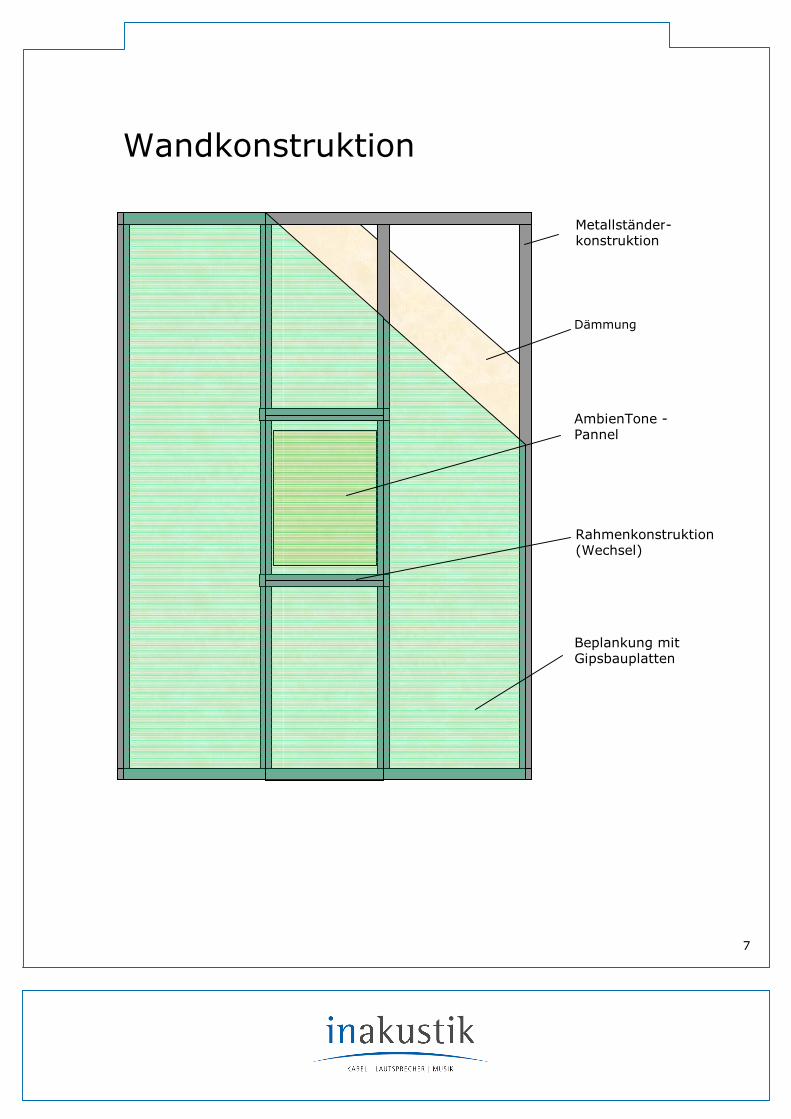
Wandkonstruktion
Metallständer- konstruktion
Dämmung
AmbienTone -Pannel
Rahmenkonstruktion (Wechsel)
Beplankung mit Gipsbauplatten
7
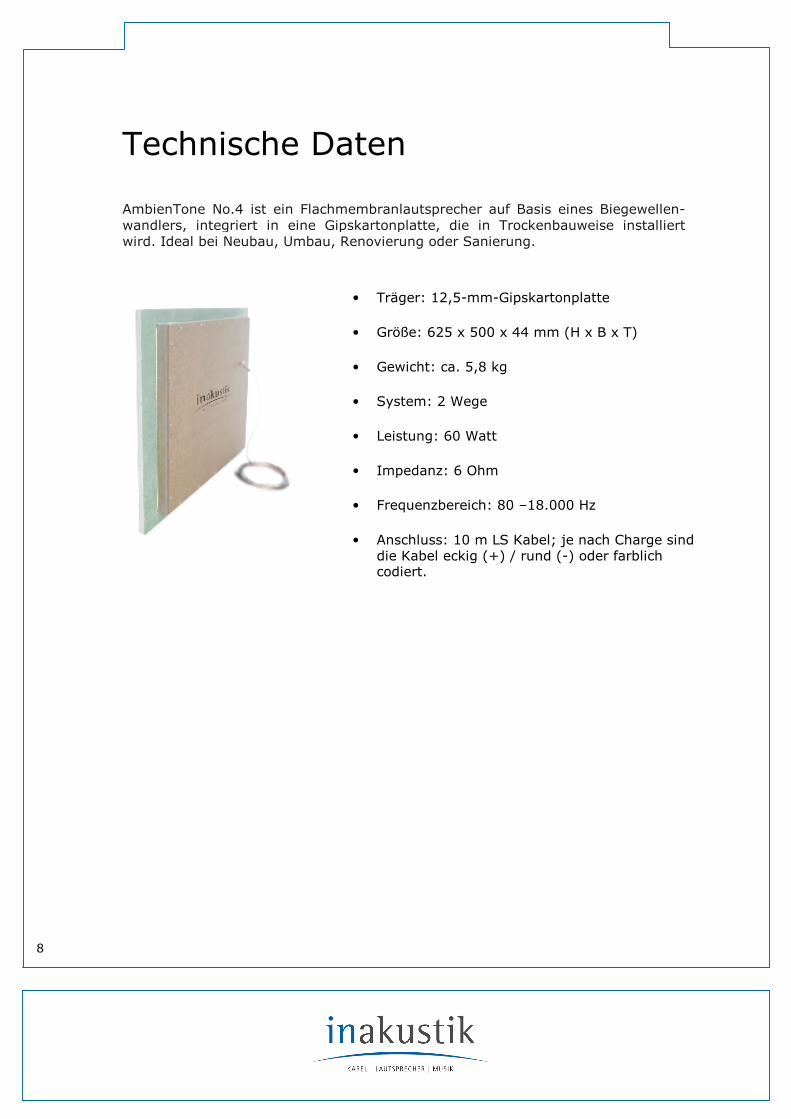
Technische Daten AmbienTone No.4 ist ein Flachmembranlautsprecher auf Basis eines Biegewellen-wandlers, integriert in eine Gipskartonplatte, die in Trockenbauweise installiert wird. Ideal bei Neubau, Umbau, Renovierung oder Sanierung.
• Träger: 12,5-mm-Gipskartonplatte
• Größe: 625 x 500 x 44 mm (H x B x T)
• Gewicht: ca. 5,8 kg
• System: 2 Wege
• Leistung: 60 Watt
• Impedanz: 6 Ohm
• Frequenzbereich: 80 –18.000 Hz
• Anschluss: 10 m LS Kabel; je nach Charge sind die Kabel eckig (+) / rund (-) oder farblich codiert.
8
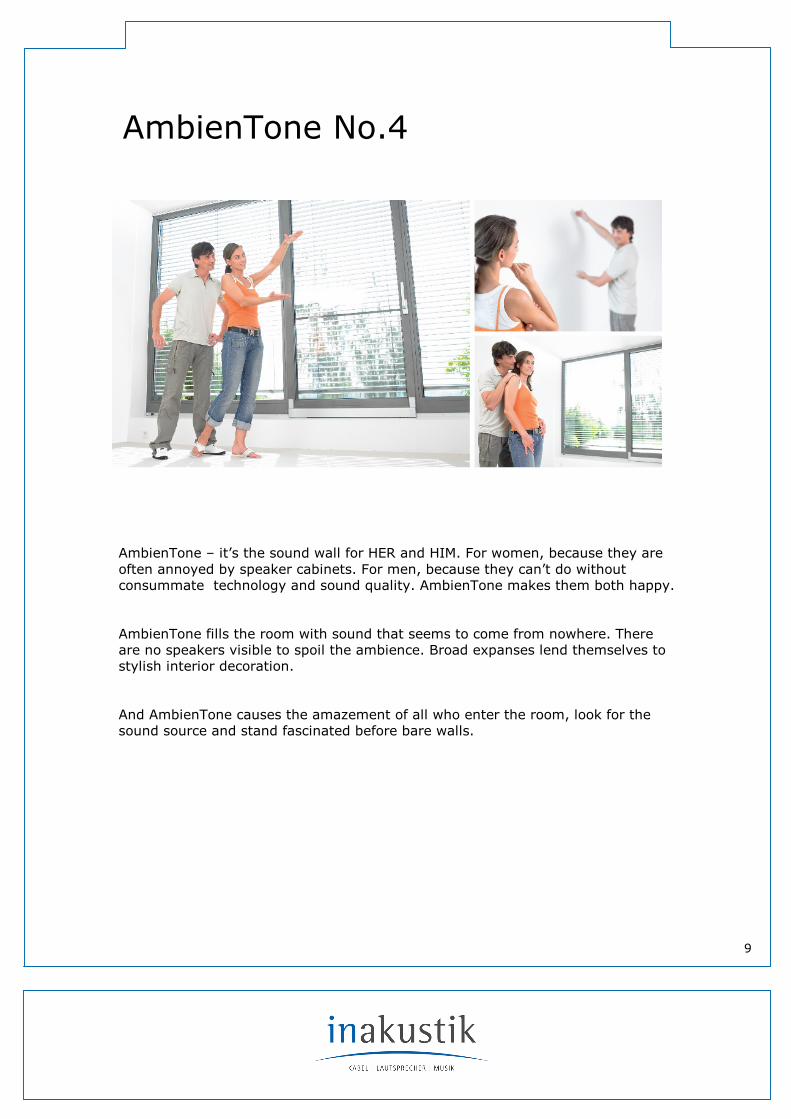
AmbienTone No.4
AmbienTone – it’s the sound wall for HER and HIM. For women, because they are often annoyed by speaker cabinets. For men, because they can’t do without consummate technology and sound quality. AmbienTone makes them both happy. AmbienTone fills the room with sound that seems to come from nowhere. There are no speakers visible to spoil the ambience. Broad expanses lend themselves to stylish interior decoration. And AmbienTone causes the amazement of all who enter the room, look for the sound source and stand fascinated before bare walls.
9
TONE AMBIEN
AmbienTone-Assembly Instructions
AmbienTone is a flat panel loudspeaker in a modified gypsum plasterboard. It is installed into a drywall constructions. And in just a few work steps.
Once connected, fitted and spackled, AmbienTone can be wallpapered over, painted and even plastered over. A coat of up to a thickness of 2 mm will result in only a minimal loss of sound quality.
Installation guide
Note: This is a brief, general description of the procedures. Fitters and contractors must take the individual materials and circumstances on site into consideration!
Step 1:
• Perform function check before fitting into drywall constructions.
• Carefully inspect the loudspeaker system for exterior defects and damage.
• Remove the 2 transport locks on the rear of the loudspeaker system.
• Check whether there are any loose parts in the loudspeaker system. To check that the loudspeaker system is working properly, pick up the loudspeaker system in both hands and shake it in all directions so that any loose parts within the loudspeaker will make a noise as they hit the sides. Any noise of loose parts indivates a defect of the speaker.
• Check the electrical functions of the loudspeaker system. To do this, connect
the loudspeakers to an audio amplifier and play a known audio test signal over them. Pay attention to the reproduction of the known test signal. In particular, make sure there are no unwanted side noises and distortions.
• Fit the loudspeaker system according to the installation instructions.
• Pay attention to the polarity (+/-) when connecting the cable.
10
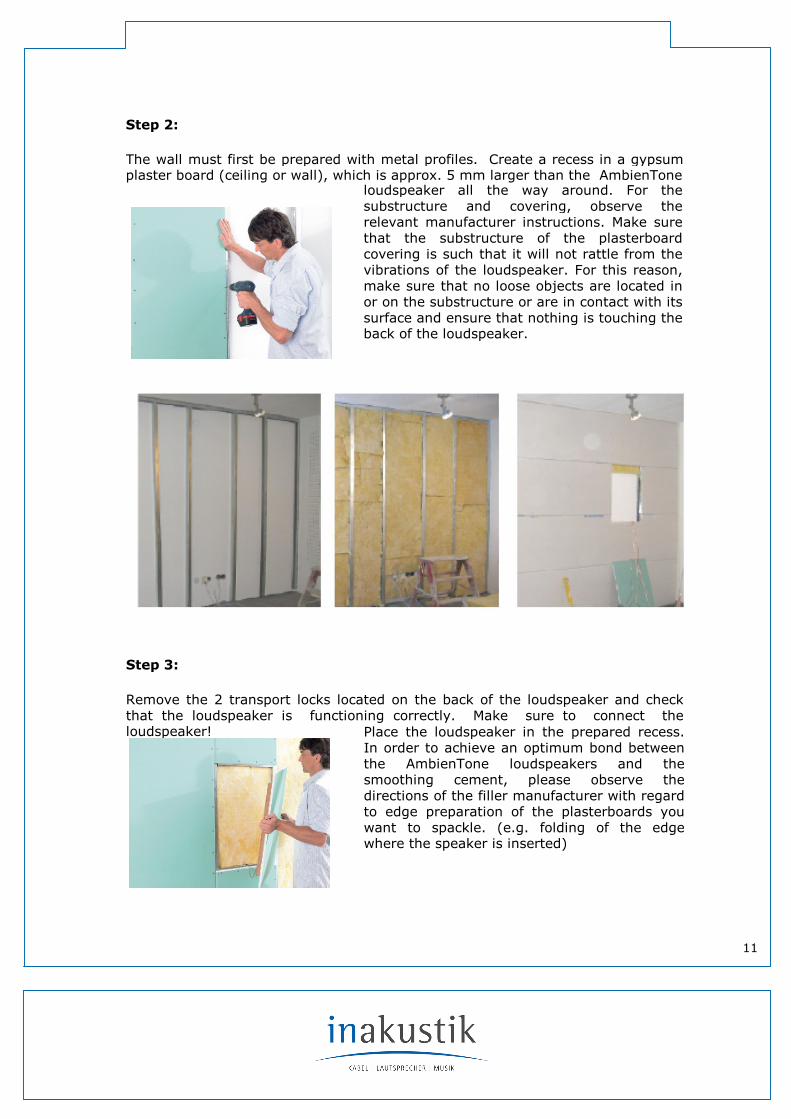
Step 2:
The wall must first be prepared with metal profiles. Create a recess in a gypsum plaster board (ceiling or wall), which is approx. 5 mm larger than the AmbienTone
loudspeaker all the way around. For the substructure and covering, observe the relevant manufacturer instructions. Make sure that the substructure of the plasterboard covering is such that it will not rattle from the vibrations of the loudspeaker. For this reason, make sure that no loose objects are located in or on the substructure or are in contact with its surface and ensure that nothing is touching the back of the loudspeaker.
Step 3:
Remove the 2 transport locks located on the back of the loudspeaker and check that the loudspeaker is functioning correctly. Make sure to connect the loudspeaker! Place the loudspeaker in the prepared recess.
In order to achieve an optimum bond between the AmbienTone loudspeakers and the smoothing cement, please observe the directions of the filler manufacturer with regard to edge preparation of the plasterboards you want to spackle. (e.g. folding of the edge where the speaker is inserted)
11
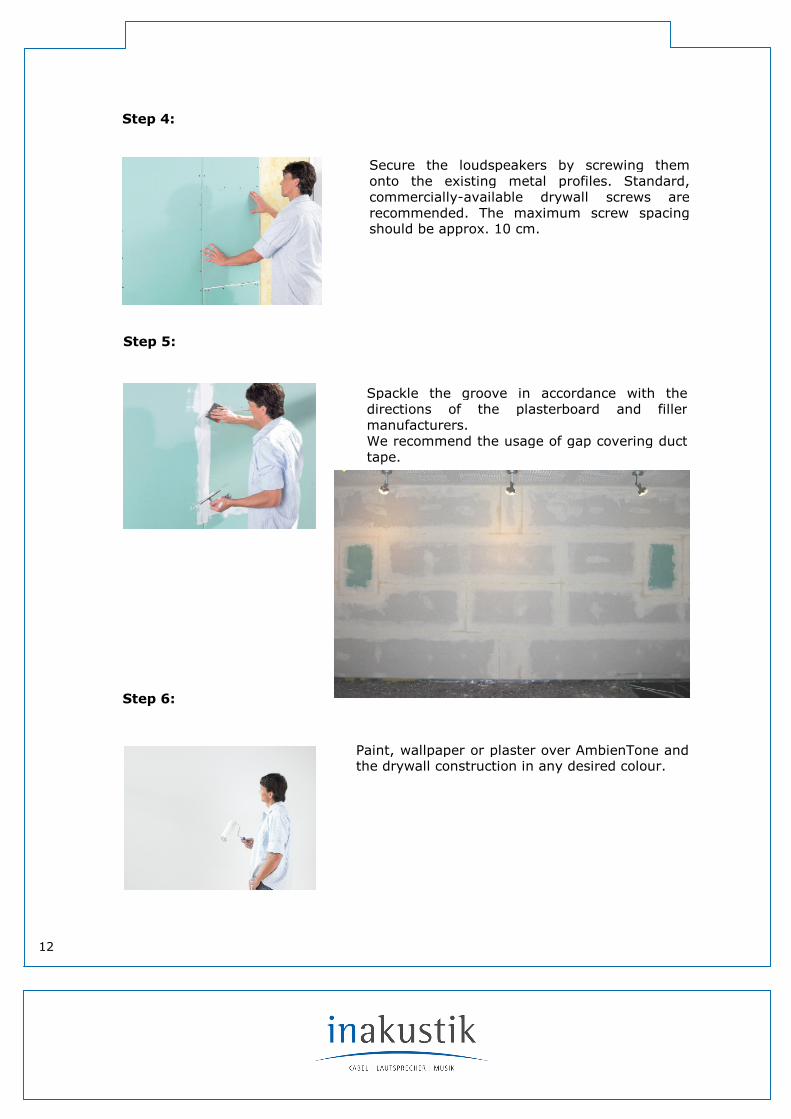
Step 5:
Spackle the groove in accordance with the directions of the plasterboard and filler manufacturers. We recommend the usage of gap covering duct tape.
Step 6:
Paint, wallpaper or plaster over AmbienTone and the drywall construction in any desired colour.
Step 4:
Secure the loudspeakers by screwing them onto the existing metal profiles. Standard, commercially-available drywall screws are recommended. The maximum screw spacing should be approx. 10 cm.
12
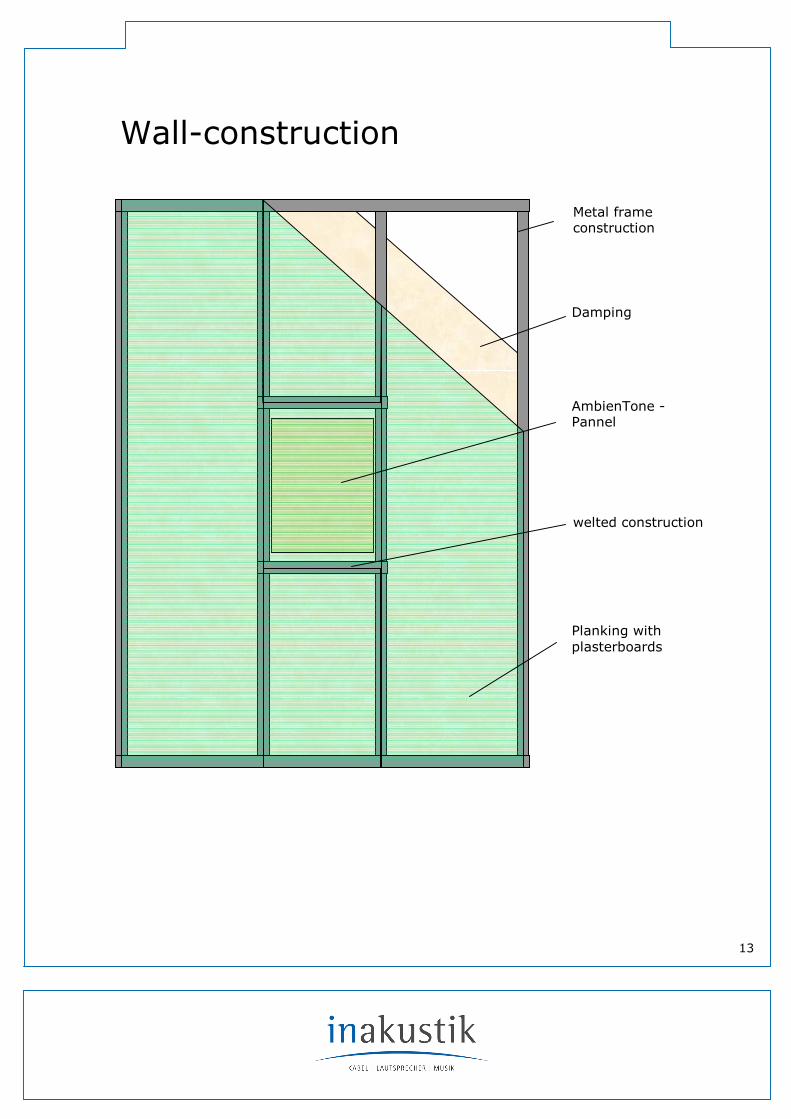
Wall-construction
Metal frame construction
Damping
AmbienTone -Pannel
welted construction
Planking with plasterboards
13
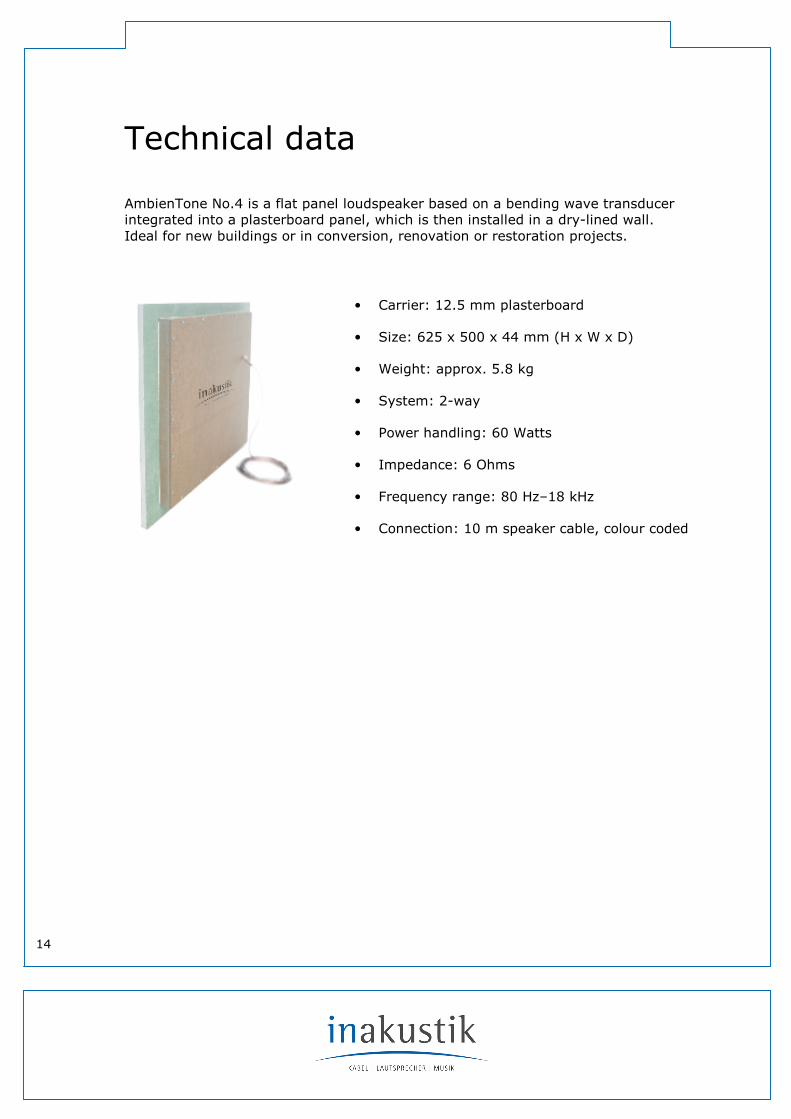
Technical data AmbienTone No.4 is a flat panel loudspeaker based on a bending wave transducer integrated into a plasterboard panel, which is then installed in a dry-lined wall. Ideal for new buildings or in conversion, renovation or restoration projects.
• Carrier: 12.5 mm plasterboard
• Size: 625 x 500 x 44 mm (H x W x D)
• Weight: approx. 5.8 kg
• System: 2-way
• Power handling: 60 Watts
• Impedance: 6 Ohms
• Frequency range: 80 Hz–18 kHz
• Connection: 10 m speaker cable, colour coded
14

15

2009
in-akustik GmbH & Co. KG Untermatten 12-14 79282 Ballrechten-Dottingen GERMANY
Tel.: Fax.: E-Mail: Web:
+49 (0) 7634-5610-22 +49 (0) 7634-5610-80 [email protected] www.in-akustik.com


